Tuesday, December 14, 2010

Absence makes the heart grow fonder?

I haven't posted in a while for a couple reasons...one, Chris and I took a well-needed week vacation to Mexico and two, we haven't really been doing much work around the house.  This weekend however, we visited Home Depot and brought along the running list of items needed for the house.  I forgot how much I liked going there.  Not so much the act of being at Home Depot but everything you can accomplish once you've returned.  Here is a list of tasks we completed over the weekend:

1) Fixed the kitchen sink that had been leaking for months.  We can safely remove the bucket and stop telling people to use the right sink only!
2) Replace the halogen light bulb above the sink.
3) Painted the white lines left behind from the painters tape in the living room.
4) Rearranged the living room furniture
5) Mounted the tv... which led to a visit to ikea, to find the perfect tv stand.
6) Put together the "tv stand" which is actually a beautiful book case... which led to another trip back to Ikea.
7) Sought out a piece to match the book shelf that would even out the other wall (beside the tv).
8) Purchased drapery hardware (still no curtains though)

And here is the end result:
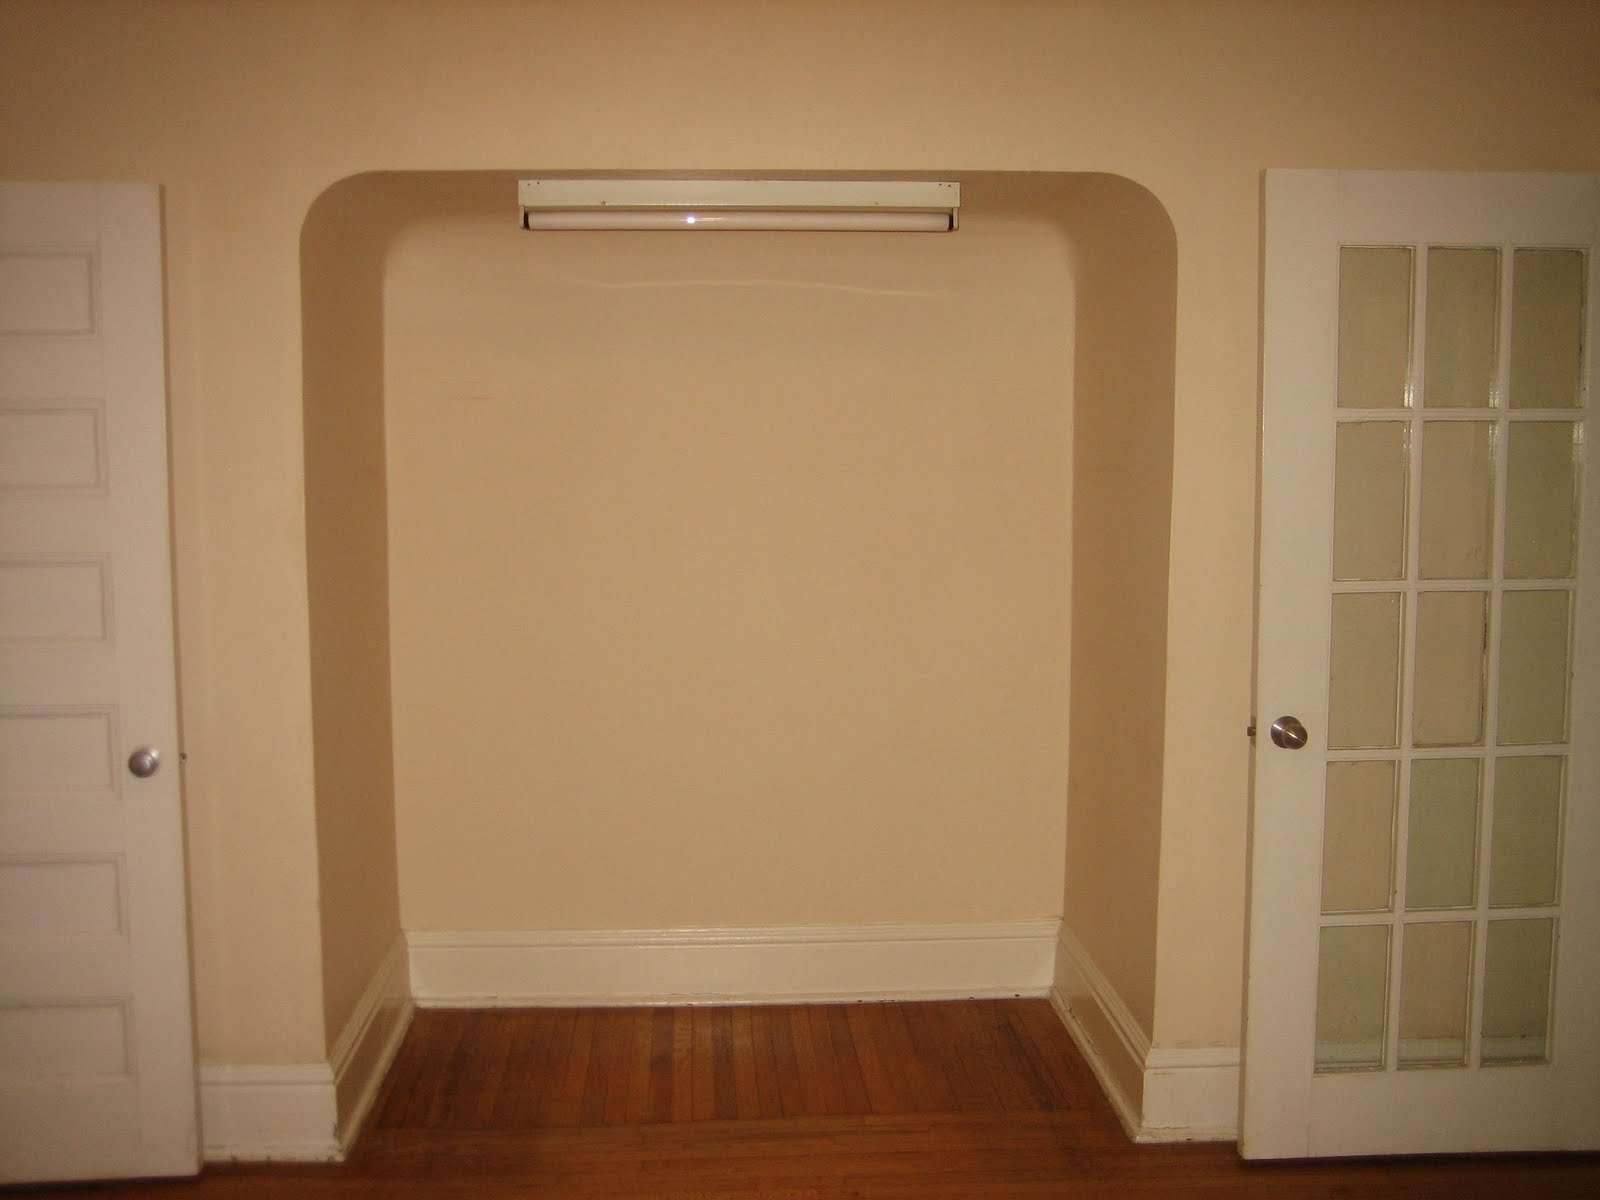
Before
After


Thursday, November 18, 2010

Beware of smell and alert the neighbors

A couple of weeks ago, I left town for a girls weekend.  While I was away, Chris slaved away over the hutch that we (ok he with a little help from me) started this summer.  I was really surprised when I got home because not only did he build the doors and the shelves but he finished the sanding and added detail and trim.  The idea behind the hutch is to have it match the diy dining room table. Chris started staining the hutch this past week (pictures to follow).  Each piece requires two coats of stain and at least one coat of polyeurethane for the finish.  The stain and finish smell REALLY strong and even cause some light headedness so Chris opened a couple of windows in the basement and we went out to walk the dog.
Diy Hutch in progress

When we returned from our walk, we noticed a fire truck on our street.  I looked at Chris and said, "that's never a good sign..."  and before I could finish my sentence I noticed some neighbors gathered on our lawn and a group of fire fighters walking out our front door.  As it turns out, our neighbors who are attached to us smelled a strong smell in their house and thought it was a gas leak.  She had noticed me come home but had not seen us leave with the dog.  When she knocked on our door, she could see my purse and phone and with no answer, feared that I was in the house passed out from the "gas".  She called 9-1-1 and the fire fighters came, broke in through the opened basement window, and toured our house.  They knew the smell immediately and even complimented Chris on the hutch.  Luckily, no one was hurt, our house is still standing, and no charges were laid.  We have taken a break on the staining though so you'll have to wait to see the finished product.

Wednesday, November 10, 2010

Happy 100th!

We got a letter in the mail this week from Municipal Property Assessment Corporation (MPAC).  It showed us what our house/property was assessed at in Jan. 2008 and a few other important details.  The most exciting detail was that we finally have confirmation of the year our house was built.  We knew that our house was definitely built in the first half of the 20th century but now we know that it was built in 1910.  Our house is in its 100th year! That really does amaze me.

Tuesday, November 9, 2010

Roof -Before and After


Before
 As you can see from the picture, we went with black shingles for our roof.  I don't think you can tell from the picture but we decided to go with the architectural shingles. Our attached neighbors had told us to pick a shingle we liked, when they were ready to have their roof redone, they would use the same design .  We consulted them on our final decision for the black architectural look and asked whether they would be interested in having the roofers re-shingle their side of the peaked roof.  I am glad that they agreed because it really adds curb appeal now that both sides are uniform.

After

In the back of our house we have an area of roof that is flat.  The flat roof needed to be stripped and redone as the old roof was rotting away.  This seemed to be ALOT of work as it took one guy several days to complete the area.

All in all we are really happy with the work that was done. If you are looking to have your roof redone, please leave a comment and I would be happy to recommend the crew!

Friday, November 5, 2010

Roof Update

Well... our roof is finally complete!  It took a gang of roofers almost a week to complete but we are REALLY happy with the results.  I haven't been able to take pictures in the day light so I will post the before and after pictures next week.  For now, I would just like to say that the roofing company we hired were a staff of diligent, efficient, hard working individuals.

Sunday, October 31, 2010

Happy Halloween!

Today was our first Halloween as homeowners!  Yesterday while walking the dog, we picked up a pumkin, carved it and toasted the seeds.  I let Chris do most of the carving.  I think he did a good job, although I am pretty sure when I wasn't looking he tried his luck with the jig saw. 
We had about 30-35 kids come by and they were all sweet as pie.  We had one little girl carrying two bags and asked whether she could have extra for her friend who was too sick to trick or treat. 


Winston was a great sport too --he pretty much only growled at the scariest looking kid. Happy Halloween!

Tuesday, October 19, 2010

Youngest Overnight House Guest

This weekend we had our first overnight baby house guest. Our friends Mike and Erika came from Ottawa and brought their 7 month old daughter, Addison.  It gave Chris and I an opportunity to see what it would be like to decorate a room with baby stuff.  Since the Master bedroom remains unfurnished (STILL!) it was the perfect room to set-up a makeshift nursery. We also proved that the house is very sound proof as it was possible to entertain 9 loud dinner guests while the baby slept soundly.


See you next year ...hopefully new and improved!

With so much work to do inside the house, it is difficult to find both the motivation and the finances to work on the outside. During the spring we pulled some weeds and removed some ferns/bushes and tried to grow some grass. 

Below is a picture of the backyard.  It is a decent size, especially for Toronto. We have grass for the dog, a slab of cement closer to the house for the bbq, and little gardens with flowers and trees. We also have a nice wood fence on the left hand side to create separation between us and the neighbors, a chain link fence at the back which slopes downward into a hill before meeting up with the next yard, and  another chain link fence on the right side which fortunately we share with really great neighbors.  It's been fun making use of the back yard for bbq's and the occasional party but now that the season is coming to a close, I can't help but dream about the work we could do back there.  I would love to finish the fence, add a deck, buy a new bbq, pull some more weeds and grow some more grass.  Hopefully this is a project I can blog about in the spring or even late summer but for now, I will just keep dreaming!

Tuesday, October 12, 2010

Baseboards

Before
Once removed
New Plaster


Complete

I have been delaying this post because I think that baseboards are really boring.  That said, they were a lot of work and actually made a big difference in each of the rooms that we have completed.  Here is a simplified, step-by-step summary of the project (in my terms).

Step 1: Chris removed the old baseboards before we ripped up the floors.  It was a painful job because they were the old thick wooden baseboards and were nailed in very tight with really long nails.  He was also trying to be careful not to remove too much of the plaster from the walls and originally we thought we may want to reclaim them (in the end it was too difficult to save them). 

Step 2: The second and third picture depicts my responsibility in the baseboard project.  My job was to plaster and re-plaster all of the removed areas.  In some cases, I slabbed on so much plaster and it likely would have been easier to cut a piece of drywall instead. Once the plaster was dry I had to sand and re-sand the surface area to make them as flat as possible for step 4.

Step 3: Cutting the baseboards.  This was Chris' job and it was quite tedious. Because the walls are all different lengths, the boards will all need to be cut accordingly.  Also, the ends need to be cut on an angle in order for the corners to match up.  

Step 4: Applying the baseboards.  We went with the tall boards since we have nine foot ceilings and the old wood ones that we had just removed were also the tall ones. We used MDF (medium density fiberboard) rather that pine or other wood.  The main reason is beause it was more affordable. I think it looks clean and nice. The caption on the last picture says "complete" but I am pretty sure we are adding a strip of quarter rounds which I will post at a later date.
 
Step 5: Caulking the baseboards. In order to hide the gap between the wall and the baseboards, we used caulking.  Most home renovators would know about this magical white filler but it was news to me. Once the baseboards were caulked, they looked great and very professional.

Because the baseboard removal project was such a pain, we decide to remove only the quarter rounds on the second floor, in order to prep for the new floors.  That is, everywhere except for in the master bedroom. We will be putting new baseboards in the master bedroom soon (which still remains empty by the way).  The "before" picture is from the second floor with only the quarter round removed.

Tuesday, September 28, 2010

New kid in town...

I couldn't resist! My sister got a puppy!!! It's a Bernese Mountain Dog.  In this picture he is 7 weeks.  They live in Ottawa.  I can't wait to meet the little guy.  His name is Guinness.

Friday, September 24, 2010

Peeping Tom

It has been 9 months (almost 10) since we moved into our lovely home.  We have not purchased a single window treatment.  In the master bedroom (which still remains empty) we have a large sheet draped from the windows and in the guest room, we usually hang a couple of towels.  The previous owner left us some venetian blinds on the third floor (our current bedroom).  The only room that really effects us at the moment is the living room.  The top is a picture of our living room window and below are a couple of options I pulled online.  Any suggestions?

Option 1

Option 2

Tuesday, September 14, 2010

Office


Originally, we wanted to turn one of the rooms up on the 3rd floor (the one that currently acts as our bedroom) into an office.  Our plan was to carpet both sets of stairs and have the room on the 3rd floor carpeted at the same time, and turn it into the office.  Chris was starting a new job in mid summer where most of his work would be done from a home office. Since we still had not (and have not) gotten around to the carpet project, nor have we competed our bedroom project, we set up the office in our small spare room on the 2nd floor.  The desk and area rug are from Ikea (mix and match).  The rest is from Staples.  That was easy! (kidding -of course).

Wednesday, September 8, 2010

Dining Room Nook


There is a nook in our dining room that we have been contemplating on how to fill. Since we ended up making our own dining room table it only made sense to complete the set. Chris measured the space and drew up the plans and we set out to the nearest Home Depot to build our new buffet. We picked up more planks of pine and started the glueing and sanding. Once the hutch is built we will stain it in the same colour as the table.


In the interim, we filled the space with a bookshelf and a couple of bar stools (for a lack of a better plan for both the nook and the furniture).

Here is a picture of the hutch as it stands now. We plan to build a shelf in the middle of each section and doors on the outsides. I can't wait until it is finished but since we (by we I mostly mean Chris because he prefers to work alone) haven't worked on it in a while, I figured I would blog about it instead. Please stay tuned for the end results!!

Sunday, September 5, 2010

Dining Room Table

My husband Chris, and I were really eager to get a dining room table and chairs so that we could start inviting our friends over for formal dining. We started to price out tables and realized that we had expensive taste (when it came to dining room tables). We really liked the rustic look, as well as harvest tables. Chris decided that it would be both fun and cost-effective to build his own table. He did some research until he was confident to make his own plan. He has promised to write step-by-step instructions on how to build a table so I can post it for those of you who are interested in giving it a try **stay tuned!**

The table was made to seat 8 comfortably and designed a little taller than your average table because Chris' family is really tall -another benefit to making your own. We purchased the chairs from a great warehouse store in Mississauga, called ARTeFAC. They have an assortment of affordable chairs and really great service.

I absolutely love the table and wish I had taken pictures throughout the process.


Monday, August 30, 2010

Work plan

By day, I am a Project Manager so I cannot help myself when it comes to developing spreadsheets and work plans. Below is a plan that I drafted in December to keep our renovation plans in check. I reviewed and updated it as best I could. I am hoping that this table will help keep me on track with my future posts.


Activity Timeframe Status
General
Electrical Replace Knob and Tube December-09 Completed
Stairs Remove Carpet January-10 Completed
Lay new carpet January-10 *Still required
Back Yard Build gate December-09 Completed
Reinforce corners December-09 Completed
Build fence Spring 10 Moved to Summer 10
Lay brick Spring 10 Moved to Summer 10
Basement Remove/replace toilet Pending Future project
Purchase washer and dryer January-10 Completed
Install washer/ dryer (add dryer vent) Pending Dryer vent still required
Remove laundry sink Pending Future project
Complete bathroom reno Pending Future project
Floors Purchase new floors and materials Dec/Jan 10 Completed
Remove baseboards January-10 Completed
Remove old hardwood June-10 Completed
Reinforce sub floor
December Completed
Lay new sub floors
December Completed
install new floor Jan 10 (main fl) June 10 (2nd fl) Completed
Purchase and Install new baseboards
80% complete
First floor Rms
Front Hall Knock down wall December-09 Completed
Living Room Knock down wall December-09 Completed
Purchase new curtains Pending *Still required
Paint February-10 Completed
Dining Room Purchase new curtains Pending *Still required
Purchase dining table and hutch Table created (March 10) Hutch to be completed soon
Paint Pending *Still required
Kitchen Purchase new appliances Pending Future project


Second Floor
Hallway Paint Pending *Still required
Master Prime Pending *Still required
Bedroom 1 Purchase ikea bed frame

Completed
Bedroom 2 Purchase office equip and set up July-10 Completed
Sun Room Remove Fridge and Stove December-09 Completed
Third Floor
Bedroom Carpet Pending *Still required
Bathroom/Kitchen Remove Fridge and Stove December-09 Completed


Saturday, August 28, 2010

Costco

Moving from a small apartment to a big house meant that we would have plenty of space for storage. Chris and I decided that it was time to renew our membership at Costco. Initially, we were planning on picking up food for a weekend barbeque but we were side tracked by a beautiful shag rug. We had been wanting to buy a rug for the living room to make it a little cozier but it wasn't high on our prioity list. We debated over the size and ended up choosing the larger one. It's perfect! It's comfy and cozy on the feet but it also closes up the living room beautifully.


We were a little worried that the dog would confuse the new rug as his new bed so we picked him up a new bed as well (Costco $24). He seems to like it!

Friday, August 27, 2010

Raise the roof

When we bought our house, we were fortunate enough to be able to put a home inspection condition in the offer. At the time of our purchase, the Toronto real estate market was considered a "sellers market", which can create an environment of multiple offers and bidding wars. When buyers get involved in a bidding war, removing a condition on their offer such as a home inspection or approval of financing is a common strategy to position oneself better than the competition. I was too nervous to waive this condition, considering that we were making the single most important purchase of our lives, to date. I am thankful for the decision because we learned a lot about the state of the house and it made us feel confident in our decision!

One of the things that the home inspector told us was that we would need a new roof come spring. Our house is designed with a sloped roof, as well as a flat portion and both would need to be replaced. With all the regular closing costs along with the cost of the early renovations, we decided to take a chance with our roof and wait until the fall. Luckily we had a dry summer and everything is still holding up well but with fall around the corner we have decided to start collecting estimates. We turned to homestars, a website that reviews general contractors in the area. If you have any suggestions for good roofing companies in the GTA, please send us your comments. In the meantime, if you use general contractors in the GTA, it is worthwhile to post a review on homestars.

Monday, August 23, 2010

Floors Part II

My husband and I ran out of "renovation steam" and wanted to pay off a few of the earlier projects before starting the floors on the second level. As the nicer weather was approaching we were having more and more house guests, which is something we absolutely LOVE! We love seeing and hosting our friends from out of town and it gives us a convenient excuse to take the weekend off of renovating. However, we started to get the itch and since we were running out of weekends to work on the house we decided to take a week off of work and rip up the hard wood on the second floor. We had the same plan to do all the prep work and hire the same crew to install the floors in a day. During this week, we moved all of our belongings to the third floor. My dreams of having a beautiful master bedroom are getting closer but the dream is even more vivid after spending so much time in the attic!

Something I haven't mentioned yet... when we first visited our house, during the open house I was having a difficult time seeing it's potential. By the time we reached the third floor, it was giving me the heebie jeebies and I looked at my husband and said "let's get out of here". Now, we have set up shop in that very room that creeped me out and it couldn't feel cozier but I am ready to move back to the master at any time!

Wednesday, August 18, 2010

Floors


I am starting to lose track with the order in which things were done! I don't want that to stop me from updating the blog so I will post pictures and updates as I see fit. We wanted to replace the hardwood floors before our move in date of Jan. 1st. Originally, we priced out dark oak floors as we wanted to match the dark oak staircase (see picture). We were trying to meet a tight deadline and found out that the factory was closed over a two week period which would have made it impossible to meet our time line. We went to another company and found a similar dark maple that was priced even lower than the oak. Even better, they had the wood in stock and available for immediate delivery. The reason that the wood was such a good deal is because it was separated in two seizes (3 inch planks and 5 inch planks). We were always interested in the wider planks but it worked out that they had just enough 5 inch planks for our main floor and 3 inch for our second floor. With our narrow hallways upstairs and smaller rooms ... it was meant to be!

Unfortunately, with ripping down walls and the electrical work we ran out of time. We had purchased all of the wood and had it all delivered so it sat in the kitchen for a few weeks until we were ready. Within a couple of weeks of moving in Chris and I (with some help from a couple of friends) ripped up all the floors on the main level, pulled up all the nails -- generally the nails are about 5 inches apart so there was a sea of nails (this is where I could be the most help), and pulled off all the baseboards. Our plan was to do all the prep work ourselves but hire people to install the actual floors.

Because we had removed so much wood, we needed to rent a cube van to transport it all to the dump. Renting the truck for a few hours gave us the opportunity to buy and transport the giant pieces of ply wood that we would be using as a sub floor. A lot of work went into the sub floor. There was measuring, cutting, remeasuring, recutting, securing the floor with screws, adding more screws to avoid creeks, and lots of leveling. The amount of time we spent on the sub floors reconfirmed our plan to have the actual hard wood installed. To complete the main floor, it took a crew of four 12 hours to complete and we couldn't be happier!

Monday, August 9, 2010

Master Bedroom

Our master bedroom is a great size, it has a decent size closet, nice bay windows, and once upon a time it even had a fireplace! Our initial thought was to remove the makeshift mantel and expose the old fireplace. I had visions of a beautiful brick fireplace decorated with candles ...

Unfortunately, when we removed the mantel the brick we found was very old and decaying. It was crumbling so easily that we were actually able to remove it all by hand. My dream of refurbishing the fireplace was ruined and we covered it up with dry wall instead. I really wanted to be creative and use the old mantel as a vanity (as you can see from the picture) but the longer I left it, the longer it became a major eye soar for my husband and I, so out it went with our next run to the dump. Currently, the master room is empty and we are living in the attic. I will update you on that situation soon!

Below is how the wall looks now. I think I a couple of coats of paint will go a long way. Please feel free to post your suggestions for paint colours.

Thursday, July 29, 2010

Wall must come down

Our house was designed with a wall separating the front entrance from the living room, leaving a long and narrow hall way upon entering. We wanted to open up the living room, creating a larger space and reducing some of the wasted space. We knew early on that this wall would be the first thing to go. What we didn't know was how challenging it would be to deal with lath and plaster.

There was a second wall designed to close off the room that had to come down as well. So my husband and I taped off the area and purchased a couple of crowbars, goggles, ventilators, gloves, heavy duty garbage bags, etc., and got to work. Dealing with lath and plaster is a messy job! The plaster weighs a tonne and created a significant amount of dust. We definitely questioned whether we were doing to right thing by handling the renos ourselves.

One of the walls we tore down was carrying the weight of two stories of wall above it and therefore the joist needed to be reinforced before we went and removed the studs. Since the job involved removing a portion of the ceiling (hence more lath) we decided to call in a skilled contractor to complete the job.


With two weeks until our move in date and Christmas holidays falling within that time frame, our contractor was able to get the job done. Also, since he was already removing a portion of the ceiling, he suggested that we add pot lights. He did a fantastic job!

Monday, July 26, 2010

The house -December 09


After conducting a thorough search for houses in our west end neighborhood, my husband and I settled on a house that was just 10 houses down the street from the basement apartment we were renting. It certainly made for an interesting move!

The house was in great condition but it would need a lot of work to update it and make it feel clean and current. Since there was a long "to do" list we had to prioritize our tasks in terms of the following: 1) absolute must 2) affordability, and 3) it makes sense. The first on our must do list was the electrical. Since our house is almost a hundred years old it consisted of the old knob and tube wiring. It is both difficult to get your house insured and a safety hazard to have this type of wiring. We were able to get insurance with a condition that we will bring our electrical up to code. Since we already wanted to tear down a couple of walls surrounding the living room, we decided to do this prior to having the rewiring started as having the walls already opened (thus accessible) would save us money in the end.

To give you an idea of our home prior to the renovations, I have posted some of the pictures from the MLS listing.